Sunday, June 11, 2006

Seed Secrets

Seeds are like dreams. When you hold them in your hands you can imagine the future: trees lush with shade and summer fruit; vegetables from distant shores; fragrant and spicy herbs; flowers busy with butterflies and hummingbirds. Whatever green things you dream of, most of them start with seeds.

From the tiny veronicas that inhabit lawns and meadows to the giant sequoias of the Sierras, almost all flowering plants set seed. Gardeners with the patience to unlock the secrets of seeds can grow almost any flowering plant no matter how large or small. The key is understanding the needs of each variety you wish to grow.

While most seeds will be happy to take right off when planted in fairly warm soil and kept evenly moist, some seeds require a little more consideration. You can start by planting out only a portion of the seeds in a packet, to see how they will do, or you can do a little research first.

Many seeds will only germinate within narrow temperature ranges. For instance, most common summer vegetables need fairly warm soil temperatures. And soil temperature is often quite different than the temperature of the air. Other seeds have genetically coded dormancy periods that require a specific cold wet time period to stimulate germination. Some seeds need light and others need dark.

Fortunately, for most plants, this information is known and it is usually listed in seed catalogs or on the seed packages. But not always. Resources are listed at the end of the article just in case you are having trouble getting any of your treasured seeds to grow. Meanwhile, here are some basic tips and short cuts to help you unlock the secrets of seeds.

Large Seeds:
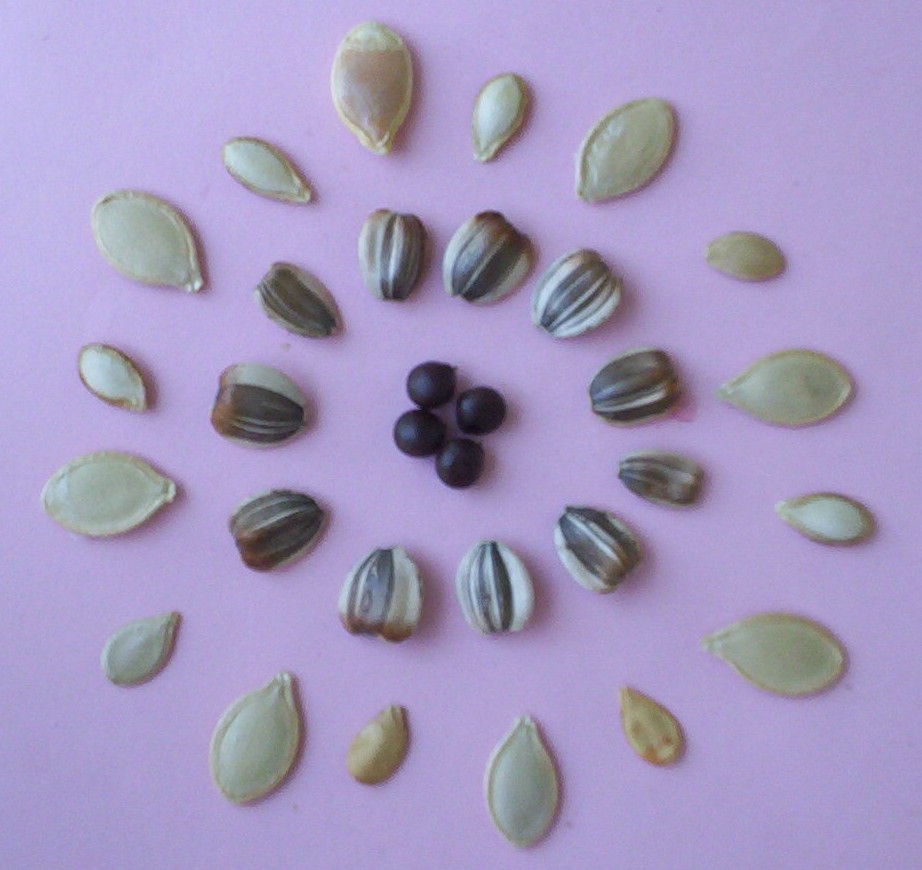
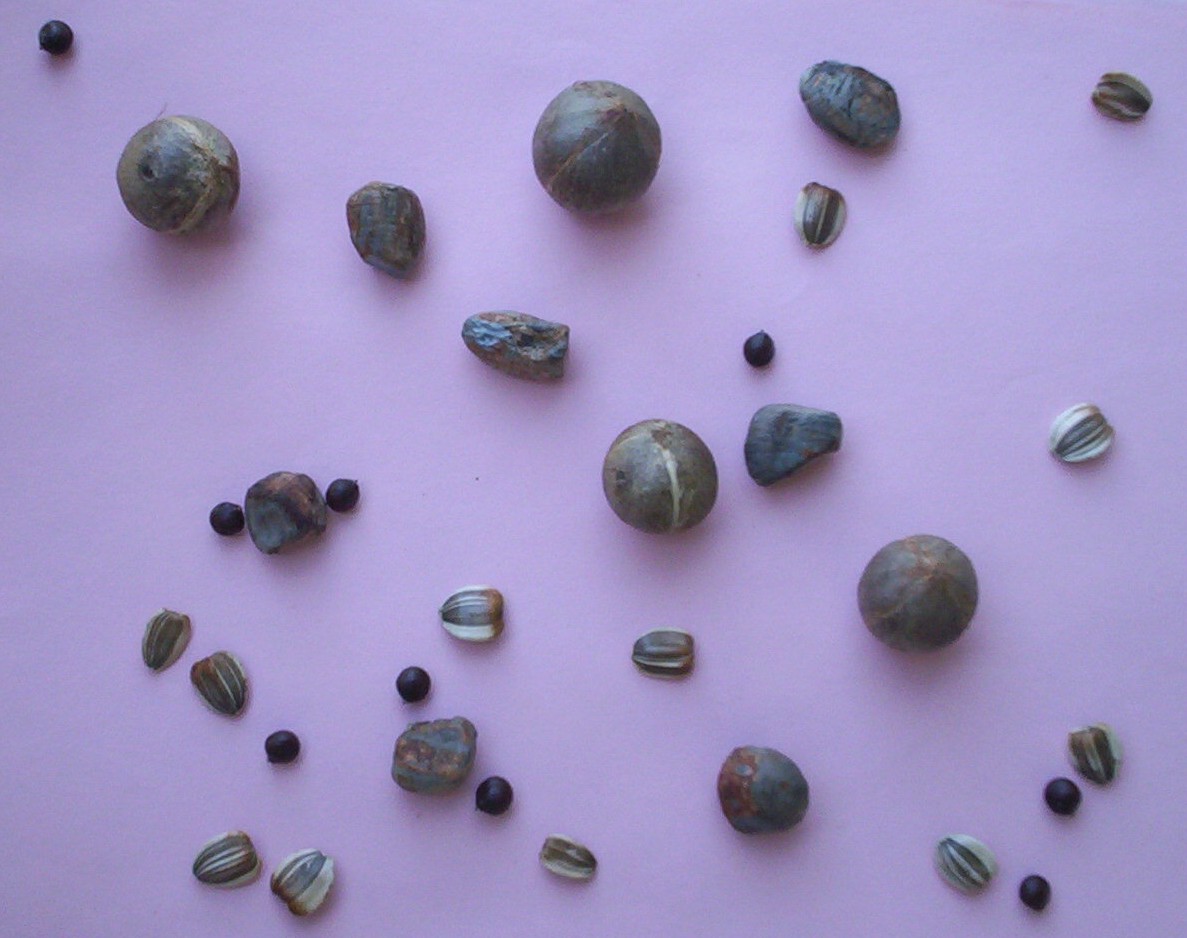
Larger seeds, like those from squash and pumpkins, generally germinate and grow quickly. They have a large store of energy to begin their life and are ready to spring into action. All they ask is a warm moist place to sink their roots and adequate sun light to start growing. A warm sunny window or porch makes a good starting place, or they can be planted out in the garden after the soil surface feels warm to the touch. I like to start a few seeds at a time – knowing full well that those I start before the soil warms up may not survive. But if they do and I get an early crop, that makes me smile.

There are exceptions to the large – quick rule. A common one is seed with hard or thick seed coats. Gourds and many trees and shrubs fall into this category. Often all that is necessary to get these seeds to grow is a well placed nick through the seed coat and a nice soak in tepid water over night. (When nicking seed coats it is important to avoid the portion that contains the plant embryo. Ask a gardening buddy for advice on this.) Some thick shelled seeds need to be cold stratified, or have other specific germination regimes. This, however, is more the concern of ornamental gardeners than vegetable gardeners.

Small Seeds:

Small seeds generally take longer to develop into vigorous plants, and the smaller the seed, the more tender loving care the young plant will need. Tomatoes can take four to six weeks from starting before they are ready to face down slugs in the garden, while our hearty pumpkins may be prepared to brave the real world in as little as two or three weeks. Tomatoes and other small seeded plants have limited food stored, so quality seed starting medium or potting soil, supplemental feeding, and lots of the right kind of light is essential.

Seed Starting Mediums:

Unless you have the time and energy to experiment, purchasing sterile seed starting medium is the way to go. These products are all ready screened, contain no weed seeds, bug eggs, or disease pathogens. For those on a limited budget, screened, sterilized compost or leaf-mold can be pressed into use. Make sure your material is well decomposed and all large pieces are removed. You can mix in a bit of sand if you like, to improve drainage. If we get a sunny day you can sterilize your mix outdoors. Evenly moisten your medium, spread it in an old metal baking pan, filling the pan to the top and gently tamping it down. Cover tightly with clear plastic wrap and place in the sun on a warm surface. An old car, or an asphalt, cement, or rock surface works well. Leave in the sun for the day, and your mix is ready to use.

Supplemental Plant Food:

Young seedlings can be feed fish emulsion (get the deodorized kind if you are keeping the plants inside), tea made from alfalfa pellets, diluted coffee, or commercial seed starting food. Fish emulsion and seed starting food are available through most seed catalogs and plant nurseries and will have directions on the label. For do it your selfers: One cup of brewed coffee, diluted, makes a full quart of seedling food and can be used once or twice a week. A handful of alfalfa pellets thrown into a gallon of water and left in the sun makes a nice supplemental plant food that can also be used once or twice a week. Some folks prefer manure or compost tea. More information on these can be found by searching on the Internet.

Light:

Plants need ultraviolet light to grow. The best source is the sun. However, grow lights and full spectrum lights are available for those of us who want to get an early start when our weather won’t allow it. If you are not ready to set up supplemental light, limit your early seed starting to sunny porches and windows. Start a few seeds at a time, and enjoy your fresh produce over a long season.

Space Saving Germination Trick:

My favorite way to start seeds is in zip lock bags. You can keep the seeds evenly moist without any effort, and it is easy check on the emerging seedlings progress. Layer 2 – 4 pieces of bathroom tissue over four pieces of newspaper cut to size. Moisten the stack, and evenly place 6 – 12 seeds on the surface. Slip this into a clean used (or new) reclosable sandwich sized bag. You can store a stack of these baggies in an evenly warm place, away from direct heat. Be sure to check daily. When the seedlings have developed their first seed leaves carefully remove the paper from the bag, and carefully transfer the seedlings to six packs or small pots of potting soil or seed starting medium. By starting seeds this way I find I get better germination rates, better seedling survival rates, and it definitely saves space.

Soil Thermometers:

A soil thermometer is a good investment for anyone serious about growing a large number of plants from seeds, particularly if you are interested in rare or exotic plants. They are also useful to the serious vegetable gardener. Most vegetables germinate best when the soil is between 70 – 90 degrees. Soil thermometers can be found for around $10.00 through many seed catalogs and plant nurseries.


On Line Resources:

The Seed Site
http://theseedsite.co.uk/seedpods.html
Scroll to the bottom of the page for links to information on germination, seed sowing, and seedlings. This site lists more varieties of seeds than most of us will grow in a life time.

Vegetable Germination Temperatures
http://www.heirloomseeds.com/germination.html
Easy to use chart gives soil temperature ranges for germination of commonly grown vegetables.


Books:

The Seed Starter’s Handbook, by Nancy Bubel, published by Rodale Press. Everything the serious vegetable gardener needs to know about starting their own seeds, from soil temperatures, days to germination, and much more.

Save Your Own Seed, By Lawrence D. Hill, published by The Henry Doubleday Research Association. This is a very cool little book that includes a chart on how long vegetable seeds can be saved. It is kind of surprising, some get old pretty quickly and some kinds can last for years.

Growing California Native Plants, by Marjory G. Schmidt, published by California Natural History Guides. Lots of information here on growing ornamental wild plants in the home landscape.

For more information see http://harvestsgardeningsecrets.blogspot.com and stay tuned, next week we will be exploring the wonderful uses of sweet alyssum. Mean while, you can probably find me out in the garden Digging the Dirt.

Copyright 2006 Harvest McCampbell
Published by the Hoopa Valley People Newspaper May 30, 2006
Posted here with permission

Sunday, June 04, 2006

Multi Use Nicotiana


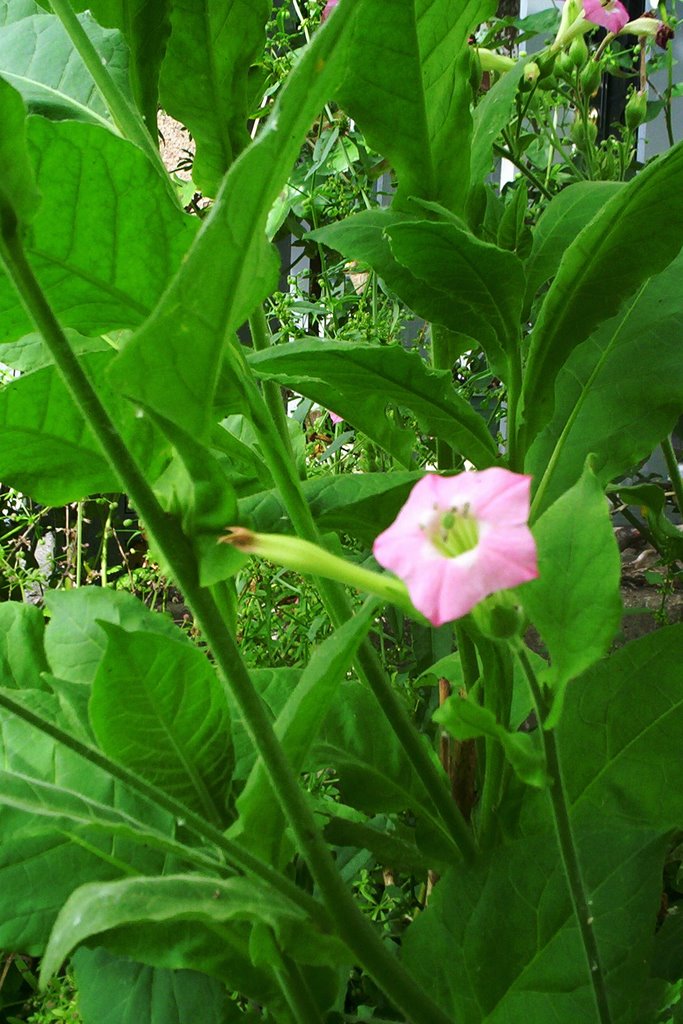
Visitors to my summer garden often stop in awe near my Nicotiana tobaccum. The question posed is almost always the same, “What is this, a four o’clock on steroids?” “No,” I laugh, “It’s a tobacco plant.” Nicotiana, which is otherwise known as tobacco, is available in a number of different species and cultivated varieties. Their delicate trumpets adorn plants that range from dwarfs that barely reach 8 inches all the way up to the old fashioned giants, like mine, that reach 4 to 5 feet high.

Nicotianas are a flower gardener’s dream. You can choose varieties with blooms in a range of colors including white, cream, rose, mauve, purple, and green. Some varieties have bicolored flowers, some have nodding flowers, and others hold their flowers up right. There are types that bloom all day, and others that are fragrant at night. They make great fillers in the perennial border, and they are versatile plants in the landscape. They do like sun, but they will tolerate quite a bit of shade. Humming birds are attracted to the flowers, which is a huge bonus as far as I am concerned. Nicotianas are long lasting in cut flower arrangements, and because of their toxicity, they are somewhat critter proof.

While the flowers are fabulous, organic gardeners often grow Nicotiana for its leaves. The leaves contain nicotine, much like commercial tobacco. Tea made from the freshly dried leaves of ornamental tobacco makes a great insecticide. Simply crunch up a few dried leaves, place them in a quart mason jar, and leave that in the sun for the day. Make sure you clearly mark your jar with a “skull and cross bones” and label it “Tobacco tea, poison,” just to make sure that no one mistakes if for homemade herb tea. This tea can be used as a drench for seedlings being harassed while still in there six packs, and it can be strained into a spray bottle to spray on older plants. The addition of a few drops of dish soap or insecticidal soap will help the tea stick to the plants.

Tobacco tea is effective for aphids, leaf miners, cabbage-worms, and many other pests. It is somewhat helpful for slugs, but not really helpful enough. (A sharp knife and a killer instinct are about the best cure for slugs. However, I am working on a few other less labor-intensive strategies. As soon as I have some success I will let you know.) Keep in mind that the tobacco tea is a poison. Poison kills living things. It may kill things you would rather keep living, so use it sparingly and as a last resort. I find, for aphids that a combination of ignoring them and attracting beneficial insects works just fine. (We will have more on both aphids and beneficial insects in up coming articles.) Cabbage-worms I can successfully hand pick. But when the leaf miners attack young plants, I definitely brew up tobacco tea.

When lessor measures fail, be sure to observe a few safety precautions. Don’t forget to clearly mark the container and definitely keep it out of reach of children. It is best to spray after dark, possibly with a flash light, to minimize poisoning the beneficial insects that are primarily active during the day. Also avoid soaking the ground in your garden beds, if at all possible. Nicotine is not good for your worms. (Worms are essential to the soil nutrient cycle.) Last but not least, it is recommended to wait at least 2 weeks before picking any produce that has been sprayed with tobacco tea.

If you are thinking of skipping growing your own tobacco and just buying commercial tobacco to use in your garden, think again. Commercial tobacco is not a good alternative to growing your own. The way commercial tobacco is propagated, irrigated, and cured makes it an outstanding source of plant virus and disease spoors. If you are going to use tobacco tea as a pesticide, it is much better to use your own home grown leaves selected from healthy vigorous plants. That way you know you will not be inadvertently trading a pest for a disease.

Fortunately, Nicotiana is widely available at most well stocked nurseries. Plants available range from inexpensive 6 packs often in mixed colors, to more costly gallon sized specialty specimens. Read the label completely to be sure the Nicotiana you choose is right for the spot you have in mind. Nicotiana can also be grown from seed. If you want to try some of the taller of more unusual varieties this might be the only way to go. Check out your nursery seed racks and see what they might have to offer.

Nicotianas are not the easiest plants from seed. First of all the seeds tend to be tiny, even dust like which makes them a bit difficult to handle. Next, to germinate and mature, the seeds and then the young seedlings need to be kept warm for an extended period of time. This around the clock warmth is sometimes difficult to provide in Northern California’s cool night time areas. It is a good idea to invest in a soil thermometer so you can explore potential locations to start your seeds. (Check with your local nursery or see the source in the next to last paragraph below.) The soil or seed starting media will need to be between 70 and 85 degrees throughout germination. Once the seeds have germinated 65 – 80 degrees is a good range until they are 3 – 4 inches tall, when you can begin acclimating them to the real world.

Avid gardeners have all kinds of ways to supply “bottom heat” to seed starting trays. Some folks utilize the top of the fridge, a shelf over the stove’s pilot light or some other warm spot around the home. Old fashioned wet/dry heating pads, food warming trays and other miscellaneous gadgets and appliances can be pressed into use. Just make sure you can maintain the temperature within the suggested range, and that you are not using something in a way that may cause a fire or electrical hazard. You can even purchase special heating arrangements intended to warm your seed starting soil. Ask at your local nursery or see the source in the next to last paragraph below.

Nicotiana, once past infancy, normally thrives in Northern CA gardens. It is not particular about soil, and will even survive in heavy clay. In hot summer areas or those with sandy or gravely soils, Nicotianas will need regular summer irrigation. If given a sheltered spot in the garden, they will often over winter, but they can look quite bedraggled by spring. In warm interior valleys Nicotiana may self sow if the seed pods are left to ripen and split. The seed pods themselves are a great bonus. While they are rather short stemmed, they are decorative enough to be used in dried flower arrangements or potpourri. For those who save their own seed to share and trade, Nicotiana produces copious amounts when it is happily situated in a warm sunny spot.

If your local nursery does not have the perfect Nicotiana to tempt you, check out: http://www.thompson-morgan.com They have yummy specimens to grow from seed that you're unlikely to find anywhere else. You can also call them to request a catalog: (800) 274-7333. If you are an avid gardener, you will love their catalog. They have a great selection of ornamental and edible plants; as well as everything you need to start your seed, including soil thermometers and several choices for bottom heat.

Copyright 2006, Harvest McCampbell, Published by The Hoopa Valley People Newspaper, May 2, 2006. Posted here with permission.

Wednesday, May 31, 2006

Summer Fruit Salad Coming Up!

On those dog-days of August, when the heat just won’t stop, there is nothing as refreshing as a chilled garden fresh treat. The subtle hues of home grown cantaloupe and honeydew melon combined with the brilliant crimson of fresh strawberries, can convince you that it isn’t really too hot to eat. Toss your fruit with a bit cool chopped mint and drizzle with honey or yogurt and suddenly you know you will survive. If we get started soon, by August we will have melons and strawberries waiting in the fridge.


Growing Melons:

Melons are extremely easy to grow. Their large seeds need warmth to germinate, but once they get going they usually take right off. Seeds are available through most nurseries and mail order catalogs and starts should be coming into the nurseries any day now. Melons need lots of room to ramble and are happy planted out in fields, rows, or tucked into the sunny edge of the yard or garden border. They are considered heavy feeders, so it is a good idea to amend their planting holes with plenty of organic matter, and mulch to provide nutrition and moisture retention.


Pests:

Few pests bother melons, although whitefly and slugs can sometimes be a problem. White fly can be controlled with simple organic sprays. Neem, tobacco tea, and insecticidal soap are all effective and they should help with slugs too. Tobacco tea should not be used within two weeks of harvest; neem and insecticidal soap will have directions on their labels. It is best to spray after dark, so you don’t poison beneficial creatures. Avoid soaking the leaves so much that they excessively drip on the soil. Except for the neem, these controls are not healthy for worms and soil microorganisms. Be sure you treat the under side of the leaves, because that’s where white flies live. Last but not least, if you notice lacewings, solider beetles, ladybugs or ladybug larva under the leaves, don’t spay at all. These voracious creatures are your friends. They will seek out and destroy pests with little or no effort needed on your part. Slugs are best controlled by hand picking early mornings and late evenings.


Air Circulation is Important:

It is best to avoid overhead sprinklers when watering melons, and apply the water only to the planting hole. This will keep the vines and fruits relatively dry, which discourages both slugs and rot. Once you have small melons developing it is a good idea to elevate them off the ground ever so slightly. Half an empty egg carton works well, as does a clean piece of old carpet. Either one will provide for some air circulation, which discourages rot and slugs. Carpet or egg cartons will also provide a bit of a barrier to gophers. I have pressed handfuls of sticks, small piles of dried weeds, and folded tea shirts into service. Your melons should be ready to pick when the tendrils nearest the vines turn brown and crisp. Then just wash them up and pop them into the fridge.


Choosing Your Melons

The smaller varieties of melons do very well in Northern CA. Our nights aren’t always warm enough to ripen the old fashioned giants. Look for watermelons designated as “Baby,” “Doll,” and “Ice Box” all of which will ripen fruit in our area. Watermelons are available with and without seeds, in red, yellow, orange, and swirled colors. Most people prefer the flavor of the red melons, but if you have room it is always fun to try something new. Cantaloupe and honeydew melons also do extremely well in Northern CA. If you live in an area with coastal influence choose a small, northern, or short season variety. If you check out the seed catalogs you are bound to find all kinds of exotic melons to try in your home garden. Keep that fruit salad in mind and choose colors that will harmonize nicely with your strawberries. When buying seeds or starts make sure to read the information on the tag, description, or label. Days to maturity should be listed. We don’t have much hope of ripening melons after September, so keep that in mind when making your selections.


Growing Strawberries:

It is definitely time to start planting strawberries! While there are many types of strawberries available, nearly all of them fall into two categories: June bearing, and ever-bearing. If you want strawberries for August fruit salad the ever-bearing kinds are the ones for you. Your next decision will be if you want really big fruit or if you prefer the smaller more intensely flavored berries. (Or maybe you want some of each?) Next keep your eyes out for the words self-pollinating. This is the best option for beginners, as you don’t have to purchase two compatible varieties to get fruit. Last but not least, check out the hardiness zones in the plant description. Here in Hoopa, on the valley floor, we are in USDA hardiness zone 8. If you are not sure of your zone, check with your local nursery, they are likely to have maps or charts to assist you. Ok, I know, this is a little more complicated than choosing a melon, but bear with me. It’s worth it. And unlike melons, you don’t have to replant them every year.

Strawberries are considered short-lived perennials, so if they are happy they will grow and bear for several years. They can be planted out in the garden with the tuck-and-run plan, or one can take a more scientific approach. I am more the tuck-and-run kind of strawb grower, maybe because I want to take the easy way out. Strawberries are most happy with full sun in the morning, and dappled afternoon shade if you live in a hot summer area. Otherwise they would prefer a situation in full sun. However, if all you have is a patch of shade, you can still grow strawberries in your borders and beneath your trees. While they may not be as productive as in a sunny garden, they are lovely plants and you are sure to get at least a few berries for your fruit salads. Here is the easy way out; just tuck the plants in anywhere you have room, keep them watered at least until established, and let them run. Left to their own devices strawberries will form a thick groundcover, and that is ok by me.

Scientific berry growers like slightly raised beds, with hardware cloth bottoms, well amended fertile soil, and deep straw mulch. They plant their berries 8” – 12” apart, and they clip all the runners until after the fruiting season is over. Then they allow each plant to develop two runners each, setting a small pot of potting soil beneath each runner. Once each runner has started one new berry plant the runner is pinched off. The new plants are used to start new beds, or traded for other varieties. The old beds are kept in production for 3 to five years and then turned under, cover cropped and the process begins again. Now, if you really love berries, or want enough to sell them or make jam, I suppose all that work is worth it. But gosh darn it, I will take the easy way out!


Sources:

Local nurseries should have strawberry plants in stock very soon. If your nursery doesn’t stock strawberries they can be mail ordered from Gurney’s at http://www.Gurneys.com (513) 354-1491. (Gurney’s also carries a selection of melon seeds suitable to grow in our area.) If you want to try some of the more unusual melons check out Johnny’s Selected Seeds at http://www.Johnnyseeds.com (877) 564-6697.


Copyright 2006 Harvest McCampbell
Published by the Hoopa Valley People Newspaper May 23, 2006
Posted here with permission