Showing posts with label top soil. Show all posts

Thursday, November 17, 2016

Beneficial Insects Love Irises!


Purple Iris, 2006, my Hoopa Garden.


Irises make an important contribution to the garden environment by attracting a variety of predatory ground beetles. The larva of these beetles live in the soil, where they consume slug eggs and slug larva.  


Dutch Iris, 2015, from Growing Together Community Gardens.


The key to putting ground beetle attracting Irises to work for you most effectively, is to plant just a few each of a large variety of Irises that bloom at different times, and spread them around the garden.  The longer you can keep the adult ground beetles happy, the more likely they will be to lay eggs in your soil.  Ground beetles also prefer soil rich in organic matter, with strategically placed sections of rotten limbs or other untreated wood, to use as daytime shelter and nursery areas for egg laying.  

Learn more about developing healthy organic matter rich soil and attracting beneficial insects by clicking on the 'labels' found directly under the share option buttons found beneath this post. 

~~~

Text and photos copyright 2016, Harvest McCampbell. Please feel free to use the buttons below to share.  All other rights reserved.

Tuesday, August 11, 2015

Slug Control


When we find damage in our yards and gardens that resembles the poor rhubarb on the right, careful eyes are very likely to discover that the slugs are out of control.  

Organic slug control begins with nurturing the soil.  Soil may seem like an odd place to start a discussion on slug control, but the easiest way to control slugs over the long term is to invite slug predators to do the job for you.  Slugs are at their most vulnerable to predation as eggs in the soil and as tiny hatchlings that live for months beneath the soil surface.  To permanently reduce slug populations we need to think about our garden soil as a living and complex ecosystem.

 
E.O. Wilson, in the Nova DVD, Lord of the Ants waxes poetic about the soil beneath our feet.  He mentions that most people think of the surface they walk on as two dimensional.  However, he goes on to explain that soil is one of the most complex and most diverse environments on the planet.  In most natural undisturbed ecosystems this is still absolutely true.  But it may not be true in your garden, which Wilson was not considering.  

The soils were we garden have often been compacted, leveled, and groomed to death.  In addition, our gardening habits may work against the soil ecosystem.   Baring the soil to the sun causes oxidation of humus and death to most soil organisms.  Further, chemical fertilizers are toxic to most soil organisms and beneficial insects, and if your soil has ever been treated with pesticides or herbicides the soil environment has been further compromised, or possibly completely massacred. 

We can, however, turn the soil around.  This is important to slug control.  A complex living soil environment will nurture and protect the beneficial predatory insects which will happily devour slug eggs and young slugs.  By improving the soil environment, we also improve the productivity of our gardens.  That’s a double win, more productivity and less damage!

In building and nurturing living soil, we may find we need to expand our ideas of what appropriate soil care is, what we might want to dig in and bury, as well as what we think is appropriate to use as mulch.  To encourage a diverse soil environment, a diversity of organic matter needs to be incorporated into the soil.  This feeds and creates habitat for a self supporting web of life, which will help keep pests in balance and protect our gardens.
This photo is from a hole I dug in a bed in my Hoopa garden, to remove mature parsnips, garlic, potatoes, and giant snow drop bulbs.  It was about 12 inches deep, possibly a little more.  I didn’t work the soil after digging.  That's just what the bottom of the hole looked like.  And, by the way, I didn’t need a shovel, I just used my hands.  The important things to note are that there are different types and different sizes of organic matter present.  And the soil, even though it is moist, is a loose assortment of various sized crumbs.  This is your goal!  Soil that is crumbly, full of air spaces and organic matter of different types and sizes is exactly what plant roots need, exactly what the soil nutrient cycle needs, and exactly what the predatory insects that dine on slug eggs and slug hatchlings need as well.

You can achieve soil like this, easily, and without spending any money.  Everything you need is probably already produced in your garden and kitchen!   This technique is a variation on an old fashioned and little known British technique.  It is variously called garbage gardening or trash gardening, and it utilizes all kinds of organic matter.  In this technique, the garden row is prepared by trenching,  the trench is then filled with organic matter including kitchen waste, weeds, and other garden debris,  which is them buried under at least six inches of soil, and the resulting mini berm is then planted.  My modified version has been named “The Compost Hole Method” by my friends, and just uses planting holes instead of trenches.  Some of my friends have further adapted the technique to their gardens, environments, and resources.  At the community garden where I am now the coordinator, we have re-adapted the technique once again; using wide trenches and probably a full ton of weeds buried under eight inches of soil.  The two photos below show two different groups of tomato plants grown in the same garden, one over the trenched and buried weeds, and the other of tomatoes that were planted in our soil in an area that was tilled, top dressed, and then had finished compost worked into the planting holes.  The tomatoes on the left were grown over the buried weeds, the ones on the right by more traditional organic methods. The difference is amazing!


Burying your compostables including weeds, garden debris, and kitchen waste pays dividends, the very first season!

"Soil both craves life and wants to produce more life, even a hundred fold."  Fred Bahson, Soil and Sacrament, page 3.

Before we get going on the Compost Hole Method, which you can modify back as a method to prepare whole rows or to prepare wide beds, I want to share a little secret with you.  Amongst all the other organic matter you will utilize in building your living soil environment, you will want to include short sections of sticks and stalks. They are the secret ingredient for super powering organic slug control in your garden.  


Many of our garden plants produce strong stalks when we allow them to flower and begin the process of setting seed.  Clip the excess stalks into sections from about 2 – 4 inches long.  These carbon rich sticks provide plenty of surface area for beneficial bacteria, protozoa, mycelium, and other beneficial soil organisms to colonize, and the green plant matter that forms the skin and pith of the sticks (as well as the other organic matter you will be burying) provide the beneficial microorganisms with food.  As the sticks and stalks are colonized and broken down, they often become hollow.  

The combination of this hollow structure and the presence of beneficial organisms creates the perfect home and food source for the tiny soil living creatures that devour slug eggs and young slugs before they emerge from the soil.  These predators will arrive in your garden as eggs laid by their mothers.  They do not come out of their eggs big enough to slay slug eggs.  They need other smaller organisms to devour while they grow.  The hollow sticks, in addition to offering them an excellent food source, also provide them with shelter from larger predatory soil creatures.  Your soil is definitely going to be a jungle of tiny creatures.  But that’s the way it should be, and it will make your work so much easier!

In the post on Slimy Slugs, I mention creating a coarse mulch of clipped sticks.  This mulch of clipped sticks is important to mature slug predators, but now you also know how important it is to include some of these sticks in the soil itself.  An abundant garden will produce enough of this material to provide for both needs, however, it may take a few years of soil building to get to the point that you have enough sticks in production to do both.  If you don’t have a source of fresh sticks and stalks to clip, check out the straw offered for mulching and bedding at your local feed store.  Most straw is actually the leftover stalks from a variety of grain crops.  Look close at a bale, and you should see that it contains hollow tubular stems.  While these stems will decompose faster than most garden stalks will, they will serve you very well until you get an ample production of stalks from your own garden.    

Check the straw out before buying, to make sure it has fairly sturdy hollow stems.  You don’t want hay.  Hay decomposes too quickly, it has very few hollow stalks, and it is full of grain and weed seed that will sprout in your garden.  Be sure to clearly ask for straw and check it out before you purchase it.  Yes, yes, I know I did say that you could do this without spending money, and you can.  It will just take a little longer if you don’t now have fresh sticks and stalks to clip.  The fresh sticks and stalks are actually superior to straw, because they still have lots of juicy plant material that will feed beneficial microorganisms, and those microorganisms will be right inside the hollow tubes where the baby slug predators can eat them while they take shelter and grow.  Sticks and stalks are better.  Straw will help if you don’t have them.  If you don’t have money for straw, just plant extra of whatever you are growing, and let it bolt and flower—your garden can easily produce plenty of stalks in a season or two.  (Weed stalks work too!)

A couple of other sources of hollow sticks you might already have around your yard are butterfly bush and elderberry shrubs.  They both attract pollinators and beneficial insects, and elderberry has the additional benefit of producing berries that are edible and medicinal.  Once well established, both of these shrubs can withstand being cut back severely, and will generally regrow vigorously.  Once you’ve clipped your sticks, you might want to allow them to dry before burying them and using them or using them as a coarse mulch.  Sometimes those short clippings will sprout and root if you utilize them fresh.  That has never happened in my gardens, but I know of other gardens where it has happened.  Another alternative is to take your chances, and then pot any up that start to grow and share them with your gardening friends.  Fresh sticks are better than dried, but dried are better than none at all.  Meanwhile, you may have other plants that produce hollow stems, twigs, or sticks in your garden.  Give them your love, they deserve it!

Ok, let’s quit talking and get to work!  The first thing to do is build soil. We’ll start with The Compost Hole Method, and build some really fabulous living soil. Once your soil will provided a comfy nursery and larder for your slug eating predators, you will want to  attract their parents to your garden.  All you need to know is covered in the post on Slimy Slugs.

You are also going to want some help cleaning up the slugs the beneficial insects miss before they emerge from the soil.  Those mature slugs are the ones we hate the most after all.  Unless you live in the desert, toads and other amphibians are probably your best bet.  You will find lots of information here on creating amphibian habitat in your garden:  http://harvestsgardeningsecrets.blogspot.com/2010/11/hedging-for-amphibians.html 


If on the other hand, you live in a warm dry environment, you will want to create habitat for lizards and snakes.  Piles of rocks and downed wood, that have lots of protected and hidden spaces for hibernation, egg laying, and escape from predators are the ticket.  If you have a large garden, you will want to include this sort of reptile habitat in strategically located spots around your yard or garden.  Snakes prefer to enter their lair at the ground level.  Lizards generally like an elevated look out, say two to two and a half feet about ground level, with safe hidey holes directly below their look out. And since snakes will eat lizards, you might want to choose which creatures you want to attract to your garden and design with them in mind. In addition, all reptiles prefer their dens to be located in the sun, and to have flat areas for basking.   Think in terms of creating garden art as you create their habitat.  It doesn’t have to be a messy pile of unsightly rocks and downed wood.  It can totally be attractive, and it can include the odd whimsical element to make it fun for other sorts of garden visitors as well.

Speaking of other garden visitors, many species of birds also have a reputation for eating slugs.  While I have not ever personally found them particularly helpful in this regard, they do provide a wide range of pest reduction services.  Attracting birds for the purpose of getting them to eat pests is a little different than simply attracting them to feeders.  Learn more here: http://harvestsgardeningsecrets.blogspot.com/2012/01/mystery-in-garden.html

It is going to take a little time to get your garden environment productive and diverse enough to keep the slugs from over populating.  In the meantime I suspect you will be hand picking, just like me.  I am gardening in a new location and still have lots of work and planning to do!  I use a plastic bag as a glove when hand hunting slugs, and I stash them in a jar with a tight lid. While I forgot to leave any head room in the half gallon jar pictured below (don’t forget!),  I filled it with slugs in about a half hour.  Ugh!  Left in the sun for the day, the slugs were dead the next morning.  I promptly buried them for their nitrogen boost to the soil and to garden plants.  When you do this, don’t let them age in the jar, they create a terrible stink; but when buried the soil forms a filter and the microorganisms make quick work of the rest, there’s no smell at all once they are buried.  (Quick tip, dig your hole before you open the jar!)   

Beware!  Slugs can carry disease.  Before you try this, contact your health department or cooperative agricultural extension and ask if slug borne meningitis is a problem in your area.  If it is, just get yourself a couple of plastic bags that have no holes, use one as a glove to collect the slugs, and the other as a receptacle.  When you’re done, knot the bag closed with the slugs inside, and stash it and the ‘glove’ in the trash.  And be sure to wash your hands!  Slug slime is gross!  Oh, but slug slim is actually good for the soil.  It helps the soil form that very desirable crumb texture and the beneficial soil microorganisms love it.  Slugs are not all bad.  But an over population of slugs is terrible. 

We are beginning to learn to think of the garden as an ecosystem, where all things exist in balance.  The role of the gardener is to steward that balance and in return to be deeply nourished . . .

Questions?  Additional organic slug control tips?  Please leave a comment!

~~~

Text and photos copyright Harvest McCampbell, 2015.  Updated 11.20.2016 with a quote and minor edits.   Please feel free to use the buttons below to e-mail, re-blog, tweet, share, or pin this post.  All other rights reserved.

Wednesday, April 30, 2014

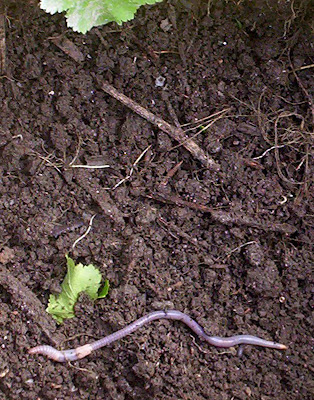
I've Got Worms!

Here they are, fresh out of their shipping package and on their way to their new home!


One of the first things I did upon moving in to my new apartment was to save one of my smaller moving boxes to start a little worm bin.  I choose a box that a regular plastic grocery bag will easily line.  I filled the bag/box about 1/3 full of organic potting soil, and then I collected a handful of clay and loam rich soil to add to the potting soil.  (That was a gift from a gopher who makes his home along the local river.)

Worms need some fine mineral soil--they ingest it and it helps their digestion.  The clay particles they ingest also supper-charge the worm castings.  It seems that the clay-humus combination excreted by worms provides many plants with exactly what they need as far as nutrition is concerned, and also as far as the delivery method.  Clay also contains cation exchange sites--which hold on to the nutrients until the microorganisms involved with the soil nutrient cycle present them with something in exchange.

There are microorganisms in the soil whose sole business is to trade nutrients they obtain from cation exchange sites with plant root hairs.  What they get in the bargain are the carbohydrates that fuel their lives.  The only source of carbohydrates, of course, are plants.  They make them from sunlight and water using nutrients they exchange with microorganism in their root hairs.

In most natural environments here in North America, this all proceeds without the help of earthworms.  There are very few earthworms indigenous to North America and they inhabit very small environmental niches.  All most all the worms we encounter here were originally from Europe. And in fact, worms are not always a welcome part of natural environments. They can disrupt indigenous soil nutrient cycles and in some areas this is threatening native plant species and the organisms that depend on them.  Just something to think about before you toss out worms leftover from fishing or before you introduce worms to your garden if you live adjacent to natural areas that do not already harbor earthworms. 

Soil nutrient cycles can do what they need to do without earthworms, but where appropriate, worms supper-charge the process!  They do their best work right in the soil of your garden, rather than in a worm bin or box.  If you haven't already, check out my article on gardening with worms here: 
Let Worms do Your Work!   You might also want to check out my related photo album on facebook: 
The Compost Hole Method.

Alas,  having recently moved into an apartment, I am no longer in a position to bury my compostables on a regular basis. Not to worry though, I do have a community garden plot in the next town, I will still be gardening and tending soil!  The only worms available locally  are night crawlers, which I really enjoy in the garden, but I have never raised them in a box before, and I wanted to stick with something familiar.  So I ordered 1/2 pound of red compost worms on-line. 

Before they arrived I made sure that their organic potting-soil-bedding was evenly moist, but not soggy.  Using a soil thermometer, I found a good spot for them in the apartment.  Sixty degrees Fahrenheit up to the high seventies is ideal.  Colder and they become sluggish, hotter and they suffer.  I found the perfect spot in my water heater closet!  Next I buried about a pint of kitchen waste in the potting soil and waited for my worms to arrive.  

Most people use shredded paper for worm bedding, and I do add some paper to my worm boxes if they start getting too damp.  However, I have found that my worms are happier, healthier, and more vigorous if their bedding is mostly chemical free natural materials, like organic potting soil and fallen leaves.  All paper has been through chemical processes and retains traces of these chemicals.  I have seen with my own eyes the difference between raising worms on paper bedding and on natural bedding.  I will stick with using a preponderance of natural material.

My current worms take about a week and a half to processes about a half a weeks worth of my kitchen waste.  I figure that eventually I will want about four times as many worms.  Living in a small apartment, this will take some creativity on my part . . .  but I am sure it can be done!

A word about smells.  A properly managed, maintained, and cared for worm box or bin has hardly any smell at all.  If I put my nose right down in the box, it has a very slight forest earth kind of scent.  If your worm box smells unpleasant, it may be too moist, too hot or cold, you may need a higher ratio of bedding to kitchen scraps, or you may need more worms or less scraps.  It is a learning process.  However there are lots of books and blogs and articles devoted to indoor "vermiposting."   Vermiposting is what composting with worms is called! Almost anyone can use this technique to recycle kitchen waste into supper-charged soil!

If you would like to leave tips, ask questions, or share useful web sites or books, please feel free to leave a comment.  I don't think Blogger will let you put a URL in comments, but you can give the names of useful websites and we can search them out!


Sunday, July 02, 2006

Let Worms do Your Work!


The lowly earthworm is really a knight in shinning armor when it comes to garden soil. They tirelessly work to improve water retention and drainage, decrease run off and erosion, aerate the soil, and improve tilth and structure. They also increase nitrogen and the bio-availability of other plant nutrients. They do all this for free and with very little help. All they ask is a safe place to live and plenty of organic matter. You can encourage worms in your garden and let them work for you. Here’s how:


Throw away your rotor-tiller:

I know this might sound sacrilegious to many gardeners, but tillers kill worms. And worms turn soil. While you are out there tilling that soil – risking injury, straining your back, and burning up expensive fossil fuel, you are killing the very creatures that will do the work for you, for free. Tilling soil encourages erosion, topsoil loss through oxidation; and the formation of hard pans. While you are loosening the top layers of the soil by tilling, you are also compacting the subsoil. Repeated tilling on the same plots eventually causes the subsoil to become impervious to water and roots. Worms on the other hand will gradually loosen and aerate all levels of the soil, recycling nutrients that have leached into the subsoil back into plants active root zones.

OK, you ask, if I can’t use my tiller, what do I do? There are many options available to home gardeners. These methods generally involve mulching with plenty of organic matter, or building raised beds. “No Till Gardening” was first made famous in 1959 by Ruth Stout in her book How to Have a Green Thumb Without an Aching Back. Fortunately for us, there is a new edition: Gardening Without Work: For the Aging, the Busy, and the Indolent, published by Lyon Press (1998). A more scientific look at no till gardening can be found in Weedless Gardening, by Lee Reich, published by Workman Publishing (2001).

Feed the Worms:

Worms like organic matter, and plenty of it. They are living creatures; they need to eat. They don’t actually live on dirt, however they do ingest plenty of common garden soil. That soil is used as grit in their digestive process, which also involves beneficial bacteria. (These bacteria fix nitrogen, improving your soil for free!) What fuels a worms metabolism is the organic matter that we burry, mix in to the soil, or use for mulch. As that organic matter begins to decompose worms work their magic.

Worms prefer freshly decomposing organic matter. That organic matter gets mixed with the grit from garden soil, beneficial bacteria, and, well, worm slime inside the worm’s gut. The worm extracts its energy and nutrition and out the other end comes what is referred to as “worm castings.” Lots of research has been done on this substance. Worm castings are high in nitrogen and nitrogen fixing bacteria, which continue to improve the soil after they have been cast. Their digestive process reduces or eliminates harmful bacteria and soil born disease organisms. The castings are also a unique chemically bound composition of mineral soil, worm slime, and organic matter. They have very beneficial effects on plant health and nutrition.

Worms deposit their castings through out the soil and at the soil surface as they go about their business tunneling and searching for food. I find that by the end of summer, any organic matter that I buried in spring has become pure worm castings. When I make my fall planting holes I use those worm castings to top dress my garden. Then I burry more organic matter for the hungry worms and plant broccoli or kale for my own dinner. Fall buried organic matter is usually not completely devoured until the following fall, but the spot can be used in summer by tucking in your plants and providing them with plenty of mulch.

"There is an entire ecosystem in a handful of soil: bacteria, fungi, protozoa, nematodes, earthworms.  Through their breeding and dying such creatures vivify the world."   Fred Bahnson, Soil and Sacrament.


Worms, worms, where are the worms?

If you don’t find several worms when sifting through a shovel full of your garden soil, you may want to purchase some to supplement those that may be hiding. The red wigglers and night crawlers available for use as fishing bait make a dynamic garden duo.

Red wigglers work the top few inches of soil, and will happily consume manure, decomposing mulch, and other organic tidbits. When temperatures turn hot, they will burrow deeper into the ground. If you have buried organic matter down where the soil stays cool, they will thrive through the summer months.

Night crawlers, when well fed, can grow to tremendous proportions. They form semi-permanent burrows and feed at the surface and on buried organic matter. They will also pull grass cuttings used as mulch down into their burrows adding more organic matter to your soil.

Between the two squiggly creatures your soil will be thoroughly cared for. Just make sure you have a shady spot with good drainage and plenty of organic matter before you hire them on. They will multiply and spread through out your garden with very little effort on your part.


More Benefits:

Besides saving your back, and improving plant nutrition, worms benefit the soil in many ways. The very slime that glues the organic matter to the mineral soil in worm castings prevents erosion and top soil loss. This glue reduces the ability of the soil to dissolve in water and get washed away by normal irrigation. The granular nature of the castings reduces the soils tendency to turn to dust and get blown away. The physical structure of the castings also benefits plant roots. Worm castings resist compaction (unless you work at it). The spaces between the castings provide room for air and moisture in the soil. And the loose structure of the castings are easily colonized by plant roots.

Worms are wonderful. They improve the soil both nutritionally and structurally. If we let them, they reduce the work of gardening immensely. They are out there right now, waiting to go to work for you.
More info:

For more information see the following articles from my blog:
A Simple Garden Routine - useful for bad backs, no time, short budgets – this article tells in detail exactly how to garden for and with the worms.

If you missed the article on organic matter, Nurture Your Soil for Free, you can read it here: http://harvestsgardeningsecrets.blogspot.com/2006/05/nurture-your-soil-for-free.html

You can also use the search function in the upper left corner of this blog to find more information on worms, soil, and organic matter: http://harvestsgardeningsecrets.blogspot.com/

For the low down on the research related to worms and gardens check out this site:
http://mypeoplepc.com/members/arbra/bbb/id19.html


Copyright 2006 Harvest McCampbell, from my column "Digging the Dirt," published in The Hoopa Valley People Newspaper, June 20, 2006. Posted here with permission.


Updated with a book quote and minor editing on 11/17.16.  Text and photo copyright Harvest McCampbell.  Please feel free to use the buttons below to share.  All other rights reserved.

Tuesday, May 02, 2006

Nurture your soil, for free!

"Soil is not dirt.  It is a living organism, or rather a collection of living organisms, and it must be feed."   Fred Bahnson, Soil and Sacrament, page 3. 

Hush now . . . listen . . . sit down here on the ground next to me, and listen carefully. Do you hear that quiet little whine? That’s the worms and the soil micro organisms. There waking up with the warmer weather and they are hungry! “Feed me, Feed me,” ever hopeful, they quietly call.

Most gardeners understand their soil needs fed to best nourish their garden plants. It stands to reason that well fed soils produce better food for our families. In the last few decades there has been a measurable decline in the nutritional value of food produced commercially in the United States. (See: http://www.soils.wisc.edu/~barak/poster_gallery/minneapolis2000a/. ) At the same time the nutritional superiority of organic produce has been well documented. (See “Good Growing” by Leslie A. Duram, pgs. 5 & 6) So when you hear the cries of the hungry soil, be sure to give it plenty to eat. Your families health will reap ample rewards.

Organic matter fuels the life of the soil, nourishes worms and beneficial micro-organisms, and supports the soil nutrient cycle. (And happy worms are quiet worms . . .) While there are many products available at local nurseries and garden supply centers that support healthy soils, free organic matter is easy to find. Even if your budget doesn’t include fancy organic soil amendments, you too can have superior soil. Below you will find a list of common materials, where to find them, and how to use them:


Coffee grounds: Coffee grounds are great in the garden. They supply nitrogen, minerals, and carbon in a fairly slow release form. The traces of caffeine that remain may provide a side benefit of being toxic to slugs. Coffee grounds can be added to soil mixes, incorporated into the top few inches of the soil when preparing garden beds, used as a top dressing, added to the compost pile, or even used as mulch. You can save your own, ask friends and relatives to save it, take a covered canister to work to collect the grounds, and ask at your favorite coffee shop or deli.

Garden debris: Lawn and garden clippings, weeds, leaves, chipped sticks and branches, all are valuable sources of organic matter for your garden. All these materials can be added to the compost pile. (Compost should be made from about 60% dry material and 40% fresh or wet material. You can sun dry your garden debris before adding to the pile to keep the ratio in balance – if the sun ever comes out. If you use too much wet or fresh material it will compact and turn to slime.) These materials can also be used for mulch. Weeds should be cut or pulled before setting seed and then sun dried so they do not reroot. Soft garden debris, such as grass clippings, weeds that won’t resprout or that have been dried, and leaves can also be buried in deep planting holes to feed the worms. Cover with at least 4 inches of garden soil, plant out your starts, and let the worms do their thing! You can collect your own garden debris and your non-gardening neighbors may contribute theirs if you ask. If you notice tree trimming companies working in your neighborhood you can ask them to dump the chips they create. These chips make great mulch.

Kitchen scraps: Turns out the science experiments in your refrigerator are good for something after all! Any leftovers, wilted produce, or vegetable trimmings that do not contain animal products can be added to the compost pile as the “wet” portion. They can also be feed to worms in worm beds or in deep planting holes. (Don’t bury or compost anything that contains meat. This will attract wild, stray, and feral animals who will make a mess out of your efforts.) While we all have kitchen scraps, I know folks that have collected scraps from childcare centers, schools, restaurants, etc. The problem with this, especially in a rural area, is that the scraps often contain dairy and meat which attract wild and possibly rabid animals. Dairy and meat scraps may also foster the growth pathogens in the compost or soil.

Fabric and fiber: Cotton, silk, and wool make excellent garden amendments. You can use them to line your planting holes – not only will they add organic matter, they will slow down those pesky gophers. They can also be laid down over short cut weeds or on the soil around plants as a weed barrier. Pile other mulch materials on top to hide your old bloomers and as an additional source of organic matter. Fabric can also be shredded and added to the compost pile as part of your dry material. Just read your labels first. You want to make sure the fabric is 100% natural fibers so you are not adding chemicals to your soil. (Dryer lint from 100% natural fibers is good compost material too!) Friends and family might save old worn out clothes and linens if you ask, as might hotels, or anyone with a fiber related business.

Paper Products: Unbleached paper and cardboard, especially those without colored inks make excellent sources of organic matter. They can be layered right on top of the soil or mowed down weeds as a weed barrier, and then covered with chips or grass clippings. They can be shredded and added to the compost pile, or buried under planting holes to feed the worms. To decompose well in the compost they can be combined with a small amount of manure or coffee grounds as a nitrogen source. Newspaper, brown paper bags, and cardboard egg cartons are ideal. Slick, coated, white, or papers with colored inks should be avoided as they may contain toxins that can enter your soil and plants. Paper products can be saved from the home and requested from friends, family, and businesses.

Manure: Livestock manure is often available from individuals or businesses who raise animals for pleasure or food production. While manure is a great fertilizer, (and generally a good source of nitrogen) it can be a source of pathogens. Manure used directly on the garden should be aged for 12 months or hot composted (see http://www.plantea.com/compost.htm ). Food grown from manure fertilized soil must be washed before eating. However, manure can also be buried at the bottom of deep planting holes, in soil that contains earthworms. The worms will make quick work of manure “and the casts don’t contain any disease pathogens.” http://journeytoforever.org/compost_worm.html

Sawdust: If you know someone who does wood working or runs a mill you may be able to obtain piles of sawdust from untreated wood. Sawdust makes great mulch. It can be layered over paper or fabric to give the garden a neat appearance. An occasional sprinkling of water will help keep it in place. Sawdust also makes a great addition to the compost pile as part of the dry portion. A source of nitrogen will also need to be included to help the sawdust break down.

Hair: This is something I have never used in the garden, but if you know a dog groomer, barber, or hairdresser this material makes a nice slow release source of nitrogen. It is also reputed to repel deer and other critters! To use as a critter deterrent the hair can be used as a mulch around the edges of the garden, or stuffed into mesh bags and hung up on the fence at deer nose level. To provide nitrogen to the soil, short lengths of hair are best, sprinkled in thin layers on the compost pile, through the mulch, or mixed sparingly with other items to be fed to worms.

Grow Your Own: Organic matter can be produced in your yard, field, or a corner of your garden. Nitrogen rich clovers, vetches, and fava beans can be grown all year around. Bulk producing sorghums and other grasses can be grown in the warm months. These materials can be cut for use as mulch, worm food, or added to the compost pile. More information and seeds are available from Bountiful Gardens: http://www.bountifulgardens.org (707) 459-1925.

And there is much morel! There are about a zillion things that can be used for organic matter. See Appendix 5, “Designing and Maintaining your Edible Landscape Naturally” for more ideas. (By Robert Kourik, Metamorphic Press, ISBN 0-9615848-0-7)

Copyright 2006 Harvest McCampbell, Published by The Hoopa Valley People Newspaper April 25, 2006. Posted here with permission.

Updated 11.19.2016:  Added a quote and minor edits.  Copyright Harvest McCampbell.  Please feel free to share using the buttons below.  All other rights reserved.